Good evening!
Tonight I wanted to show you a cool, inexpensive image transfer technique! I am calling this technique Packing Tape Image Transfer.
To get started, there are a few supplies you will need to round up:

Clear Packing Tape

A pair of scissors

Water. Here I am using a small spray bottle, but you can use a bowl of water and a brush, or whatever is handy.

You will need various images either cut out from magazines, printed on a laser printer, or photocopied images. The important thing about the images that you choose is that you want to make sure the ink is colorfast. You do not want the image to run when you get the image wet.
I have a tendency to use small images; images that fit the height of the packing tape, however you can use larger images by overlapping the edges of the tape to make sure the entire image is covered by the tape.
To get started press the tape to the image, making sure that the image is fully covered, and smooth. You can use a brayer, a bone folder, or a finger, which is my tool of choice to make sure the image is stuck firmly.

Flip the adhered image over and spray with plenty of water, let soak for a few minutes. You can also brush water on with a brush if you would like, and I have also heard that some people sometimes just drop the entire adhered image into a bowl of water to accomplish this – I find that spraying the water is just faster, and less messy for me! 🙂

After a few minutes of letting the water permeate the paper, start vigorously rubbing the back of the image to peel all of the paper off. The thicker the paper, the longer this will take. Be careful that when you get down to the ink from the image itself, make sure not to rub or scratch the ink off of the tape, otherwise you will end up with only a partial image. However, if you do not rub all of the paper off, you will end up with a milky looking transparency. So stop when you get to the desired look that you are going for.

Once all of the paper has been rubbed off, you will then be left with a transparent image to use any way you would like. NOTE: The tape will still be tacky to the touch, and can be stored by placing on a sheet of wax paper, if you are not going to use them right away.

Here is a sample of another magazine image I have created a transparency out of, and have overlayed it onto some decorative paper.

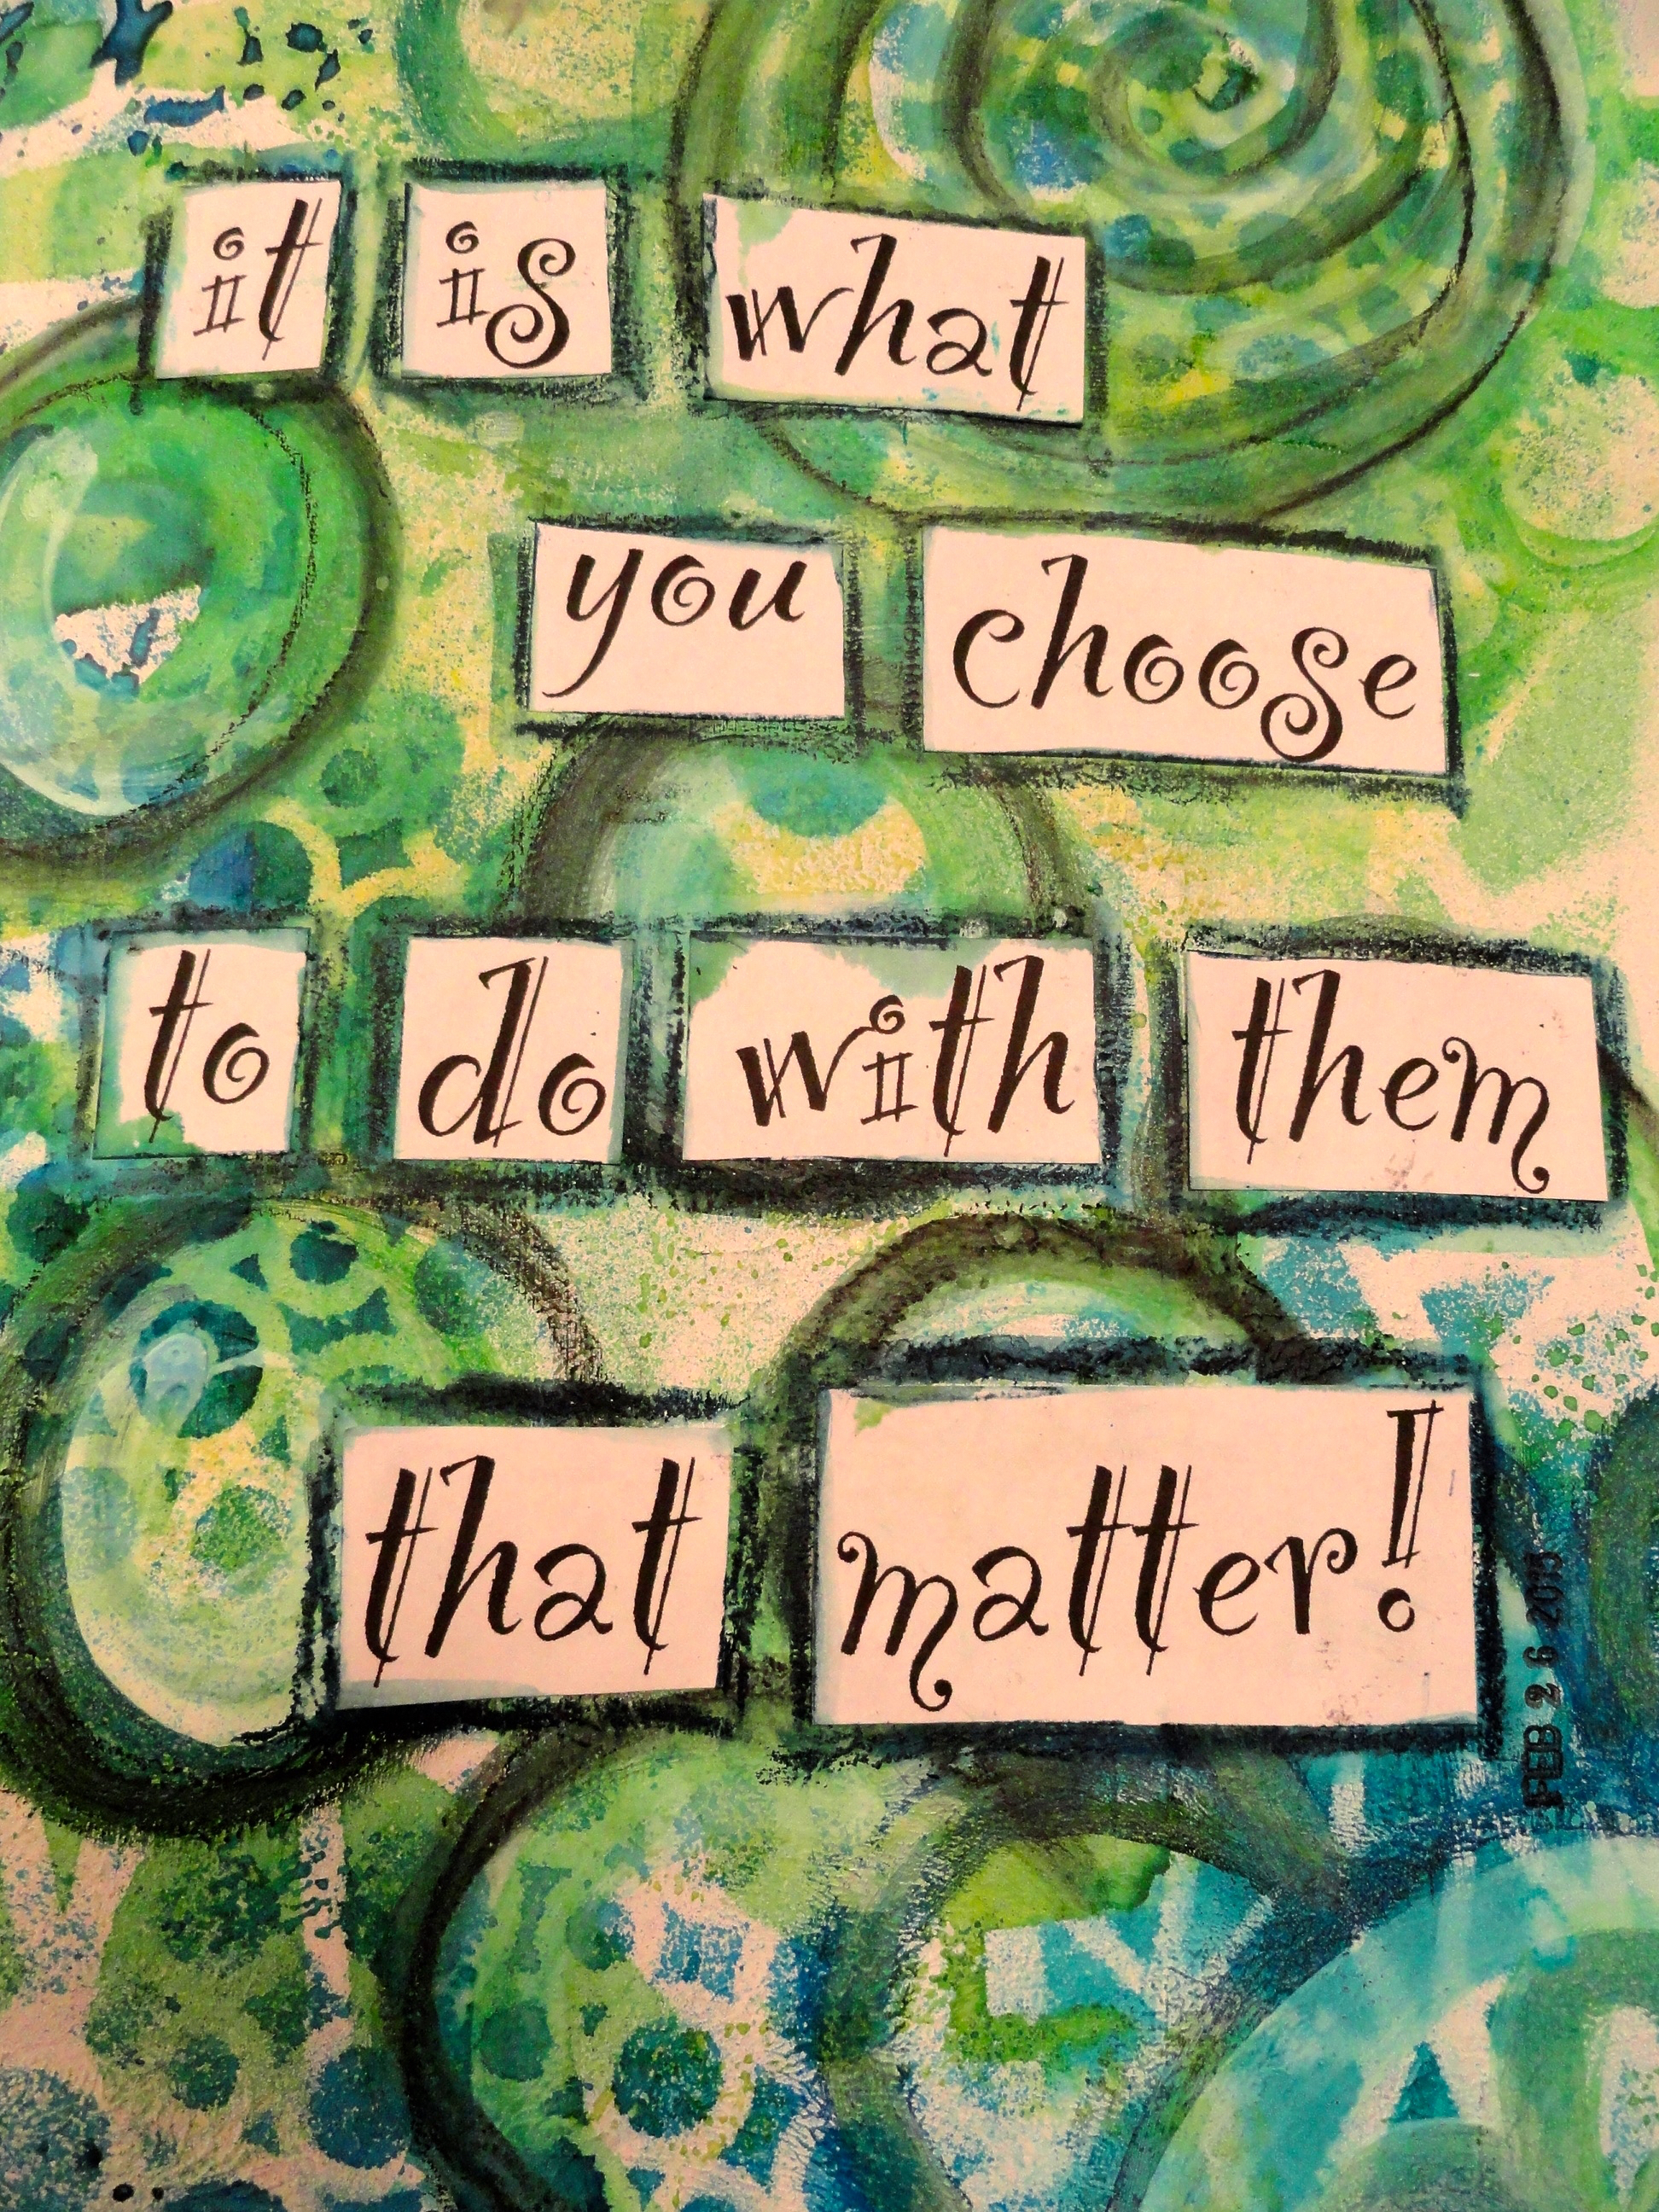
Here is an example of a journal page that I used this technique on the words, which I printed using a laser printer.

NOTE: Even though these images were still tacky to the touch, I used Gel medium to make sure that they will stay adhered to the pages.
I hope that you have enjoyed this Tuesday Tutorial and are inspired to give this technique a try yourself! If you do, please feel free to share the link with us in the comment section! I can’t wait to see what you come up with!
If you have not yet subscribed to This Artsy Life already, please do so by clicking on the Subscribe button kn the right-hand column.
Also please feel free to take a copy of my Blog Button to share with your blog readers. That Code is found under the This Artsy Life Blog button in the right hand column.
You will be happy that you did!
Here is to a FABULOUSLY ARTSY evening! 😉

If you want to have a different life, you have to live differently!!